You already have the hard part: a spreadsheet that does the maths. This turns one into a calculator you can put on a web page. About ten minutes.
What you will build
A time-savings calculator — the kind that sits on a landing page and lets a prospect work out what your product is worth to them.
The visitor enters their team size, hours saved a week, and hourly cost. It answers with hours and money saved a year. With 12 people saving 2 hours a week at $45 an hour: 1,152 hours and $51,840.
Grab the example spreadsheet and follow along, or use one of your own — anything with a few inputs and a formula works the same way.
Download the example spreadsheet (.xlsx, 7 KB)
It is five rows:
| Cell | | |
|---|---|---|
| B1 | People on the team | 12 |
| B2 | Hours saved each week | 2 |
| B3 | Average hourly cost | 45 |
| B5 | Hours saved a year | =B1*B2*48 |
| B6 | Money saved a year | =B5*B3 |
Three numbers a visitor should control, two formulas they should see the answer to. That is the whole shape of a Numio calculator, whatever the size of the sheet.
Two ways to start
You can import a spreadsheet or write the formula in Numio. This guide takes the import route, because most people already have the maths in a sheet and it is the faster of the two.
Either way, only step 1 differs. Everything after it — the blocks, the wiring, the publishing — is identical. If you have no spreadsheet, skip to starting from a blank sheet and then rejoin at step 2.
1. Import it
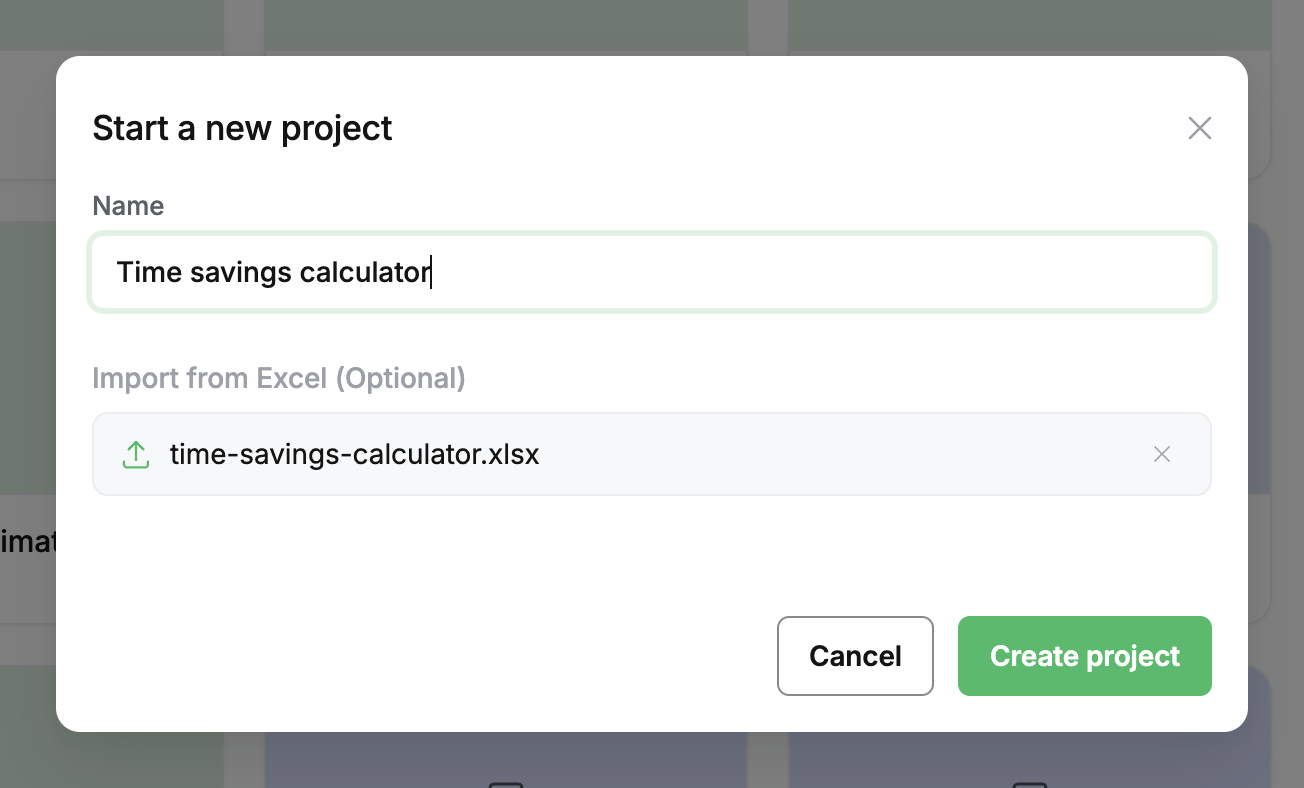
- From your dashboard, start a new project and give it a name.
- Drop the file onto Import from Excel, or click to browse.
- Click Create project.
Numio opens the editor with your sheet in the Formula tab. Every worksheet becomes its own tab, and formulas come across intact.
Numio accepts .xlsx, .csv and .tsv. Legacy .xls is rejected — re-save it as .xlsx first. If you would rather import later, the Formula tab does the same thing at any time.
Imported content starts at column D, not column A. All the references are rewritten to match, so the model still computes — but the cell you look for will be
E1rather thanB1. Use the addresses you actually see in the Formula tab.
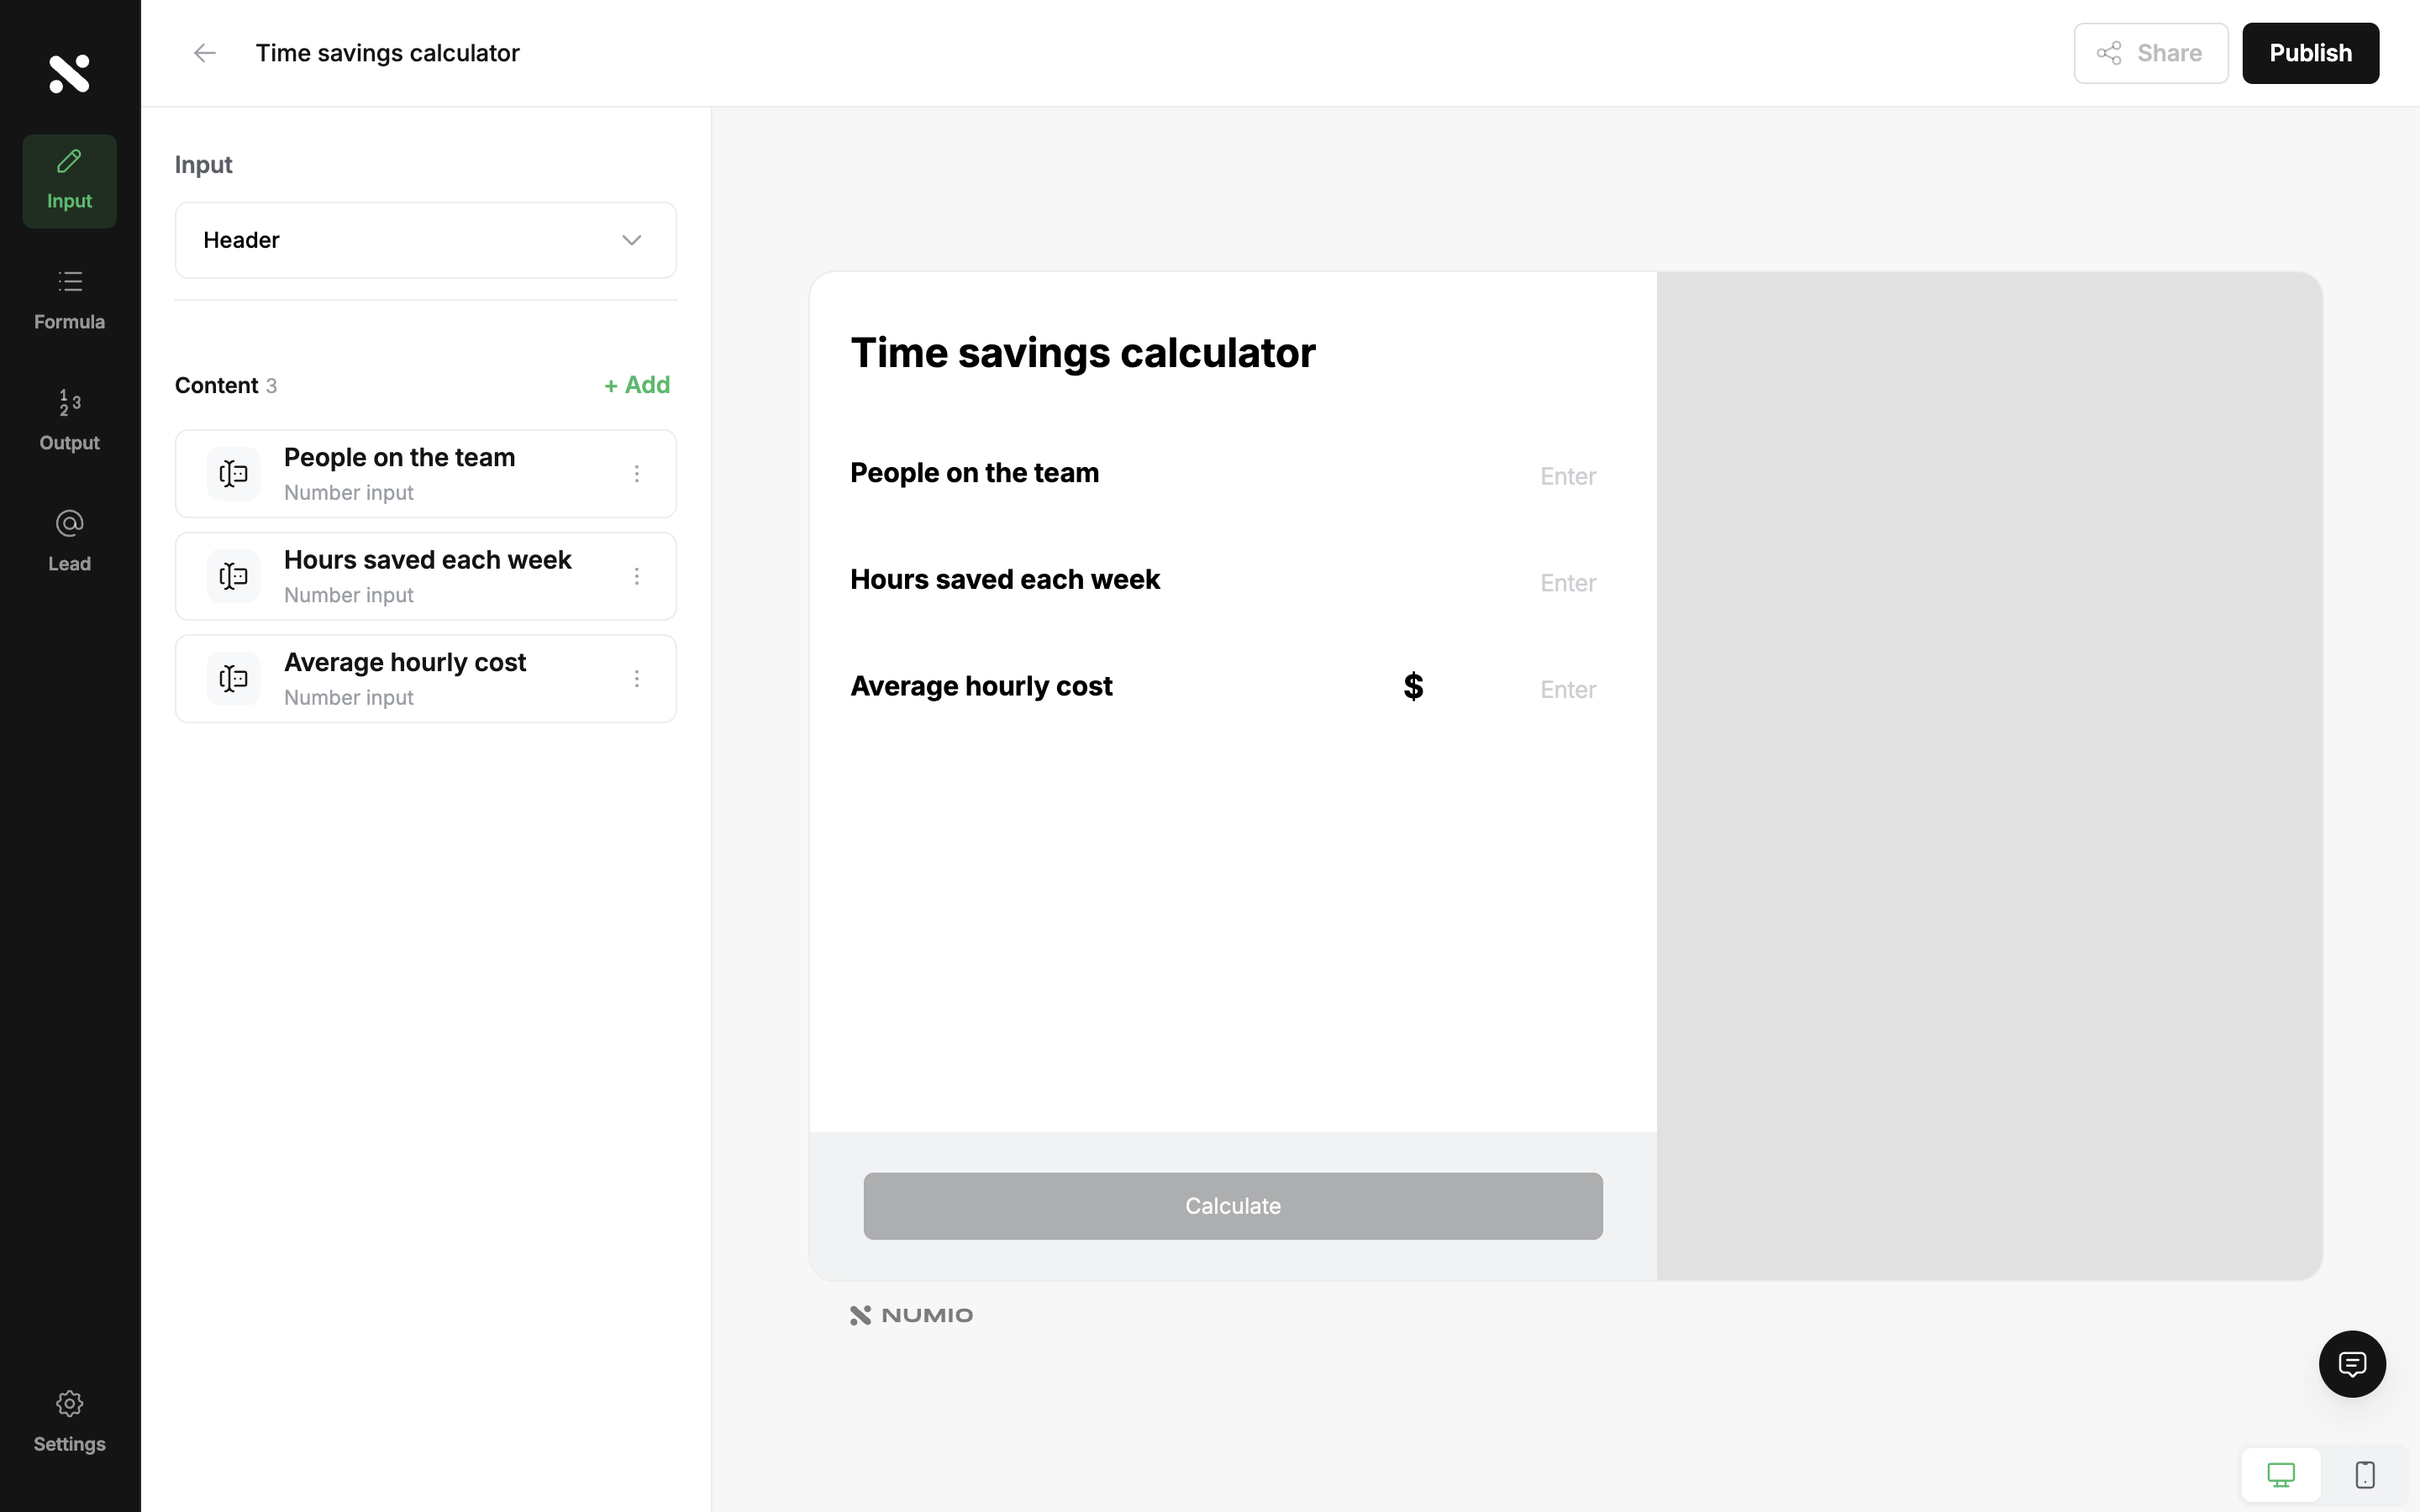
2. Add the three inputs
Open the Input tab. Click + Add, choose Input Field, and do that three times. Title them:
- People on the team
- Hours saved each week
- Average hourly cost — set Display as to Currency
3. Point each input at its cell
This is the only step that is specific to Numio, and it is the one that matters.
- Select People on the team.
- In its settings, find the Formula box and click Assign. The spreadsheet slides in.
- Click the cell holding
12. - Confirm — the button names the cell, for example Assign E1.
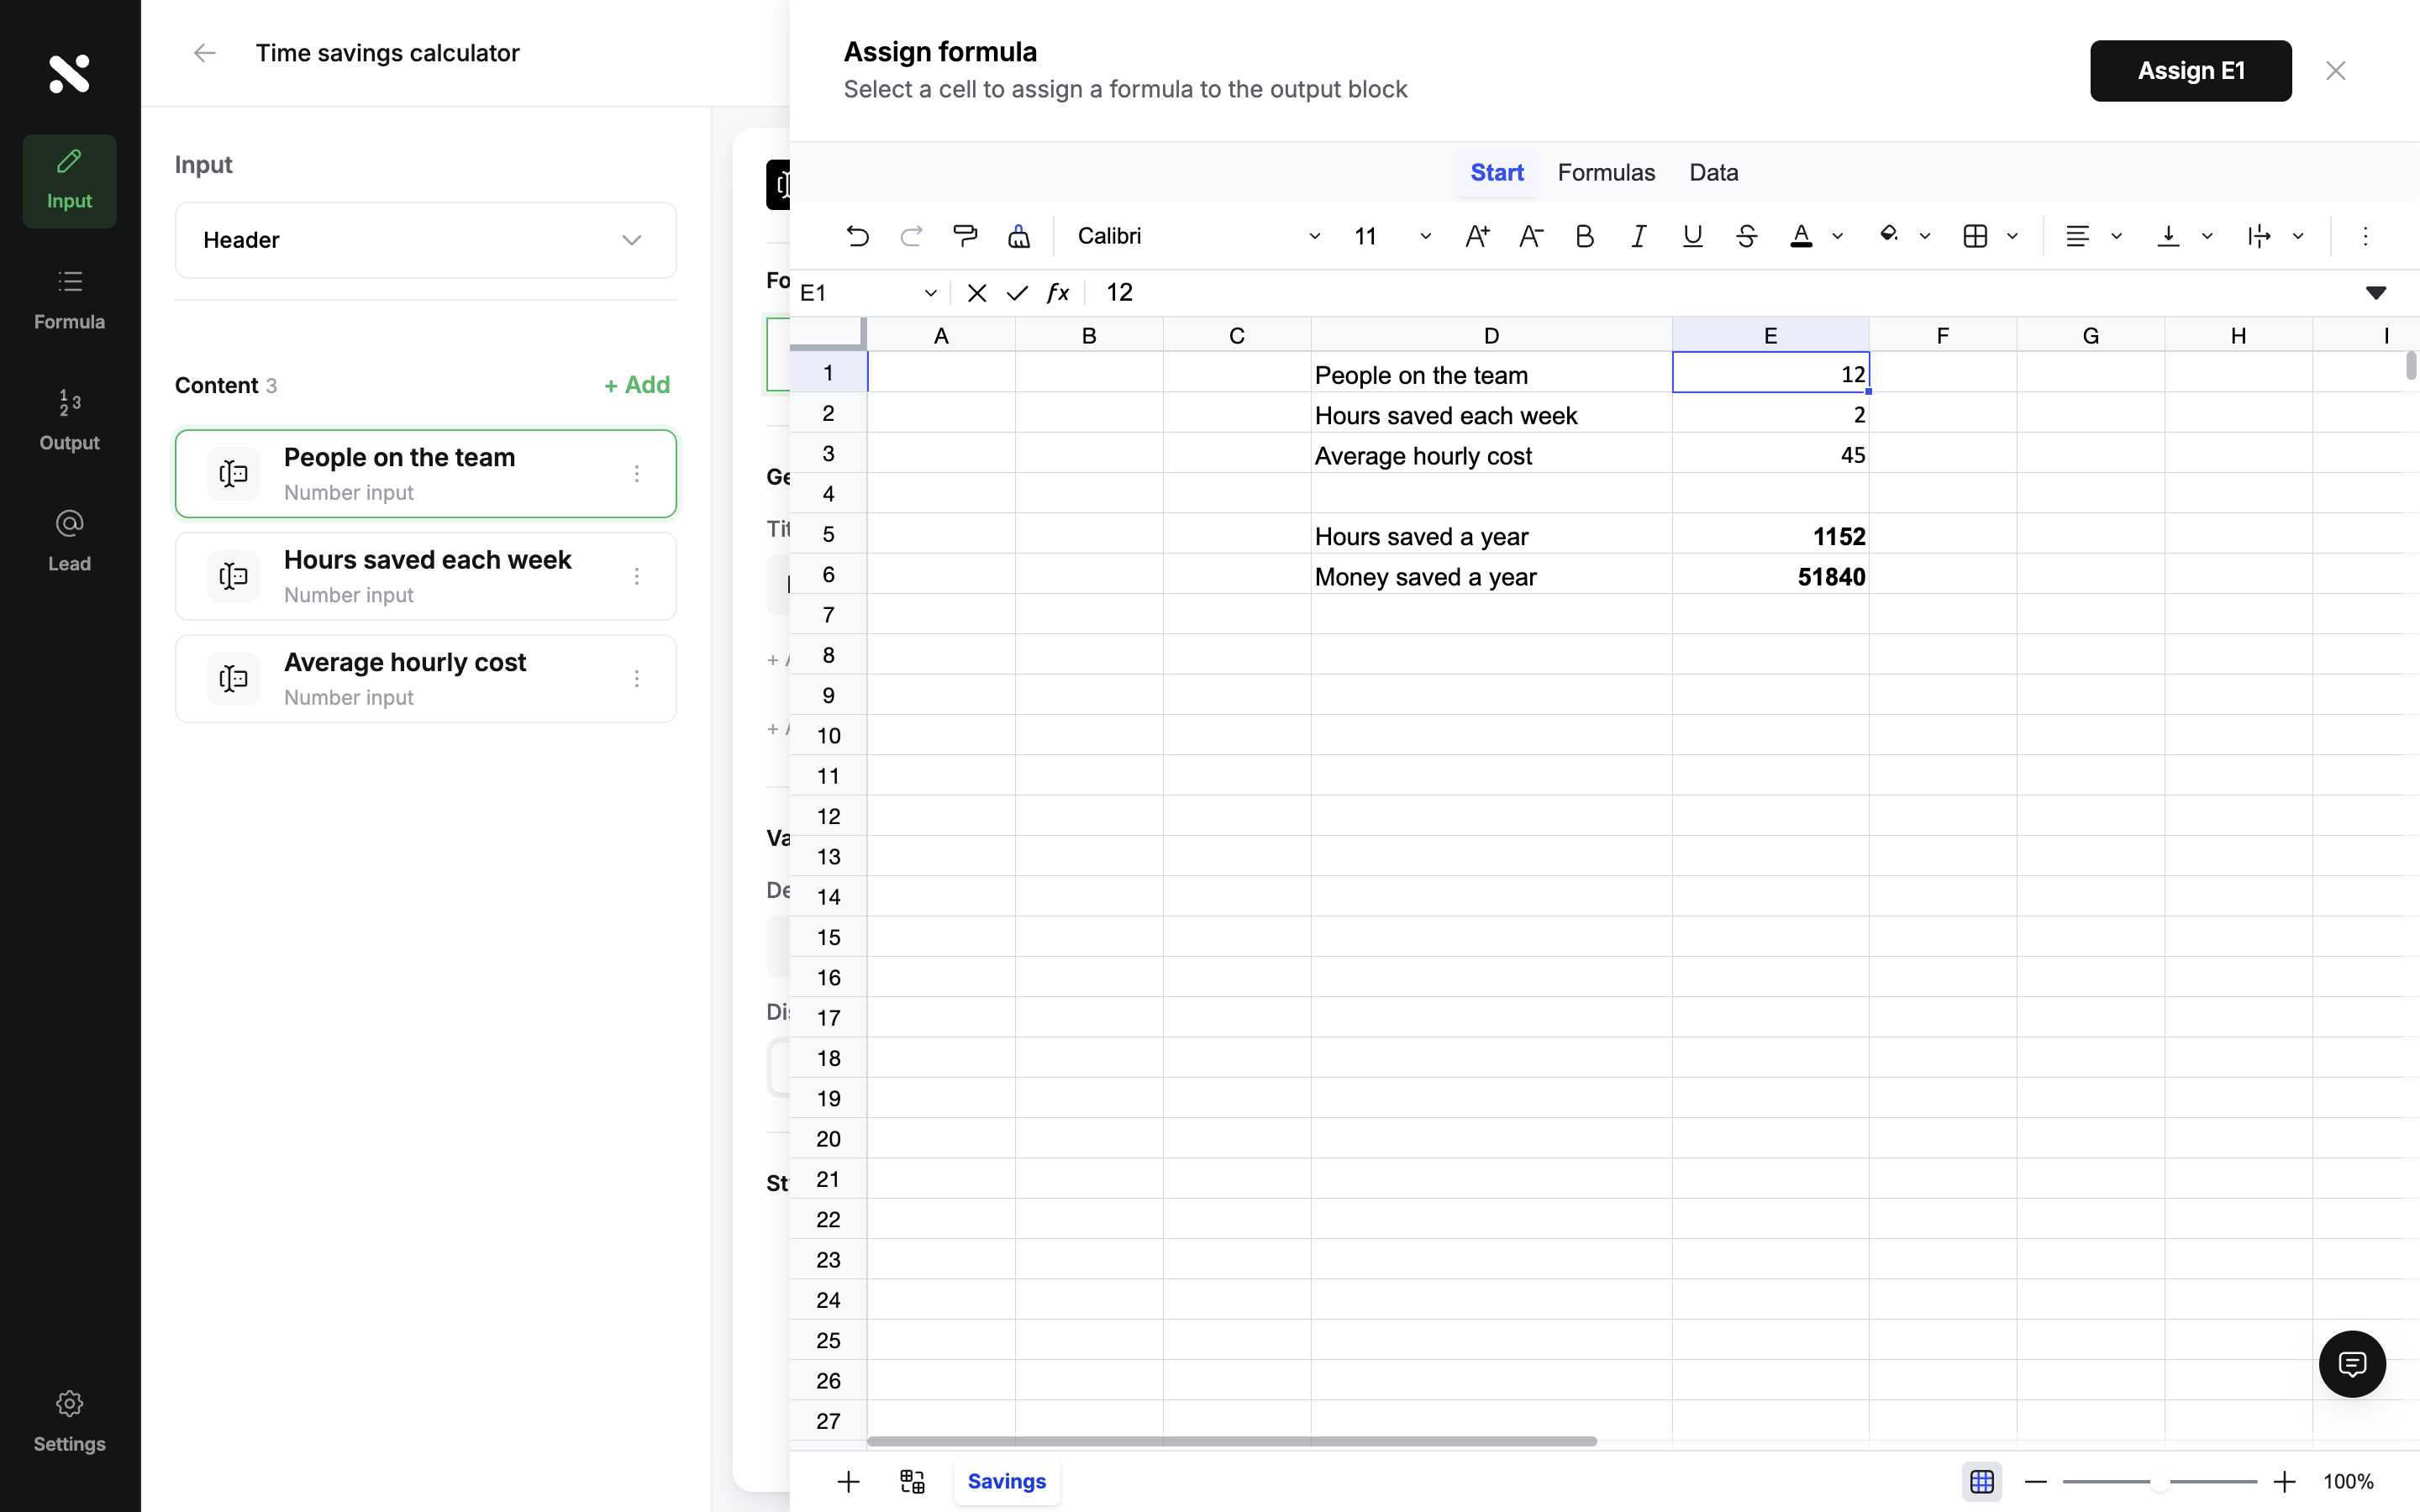
Do the same for the other two, pointing each at its own number.
Assigned cells are tinted so the wiring is visible: amber where an input reads, green where a result shows. Click a tinted cell and a chip tells you which block it belongs to.
One thing that surprises people: the numbers in the sheet stay yours. Numio does not overwrite them as you edit blocks. They are your sample values; when a visitor uses the published calculator, their entry is substituted for that cell and the formulas recompute. The Formula tab explained covers this properly.
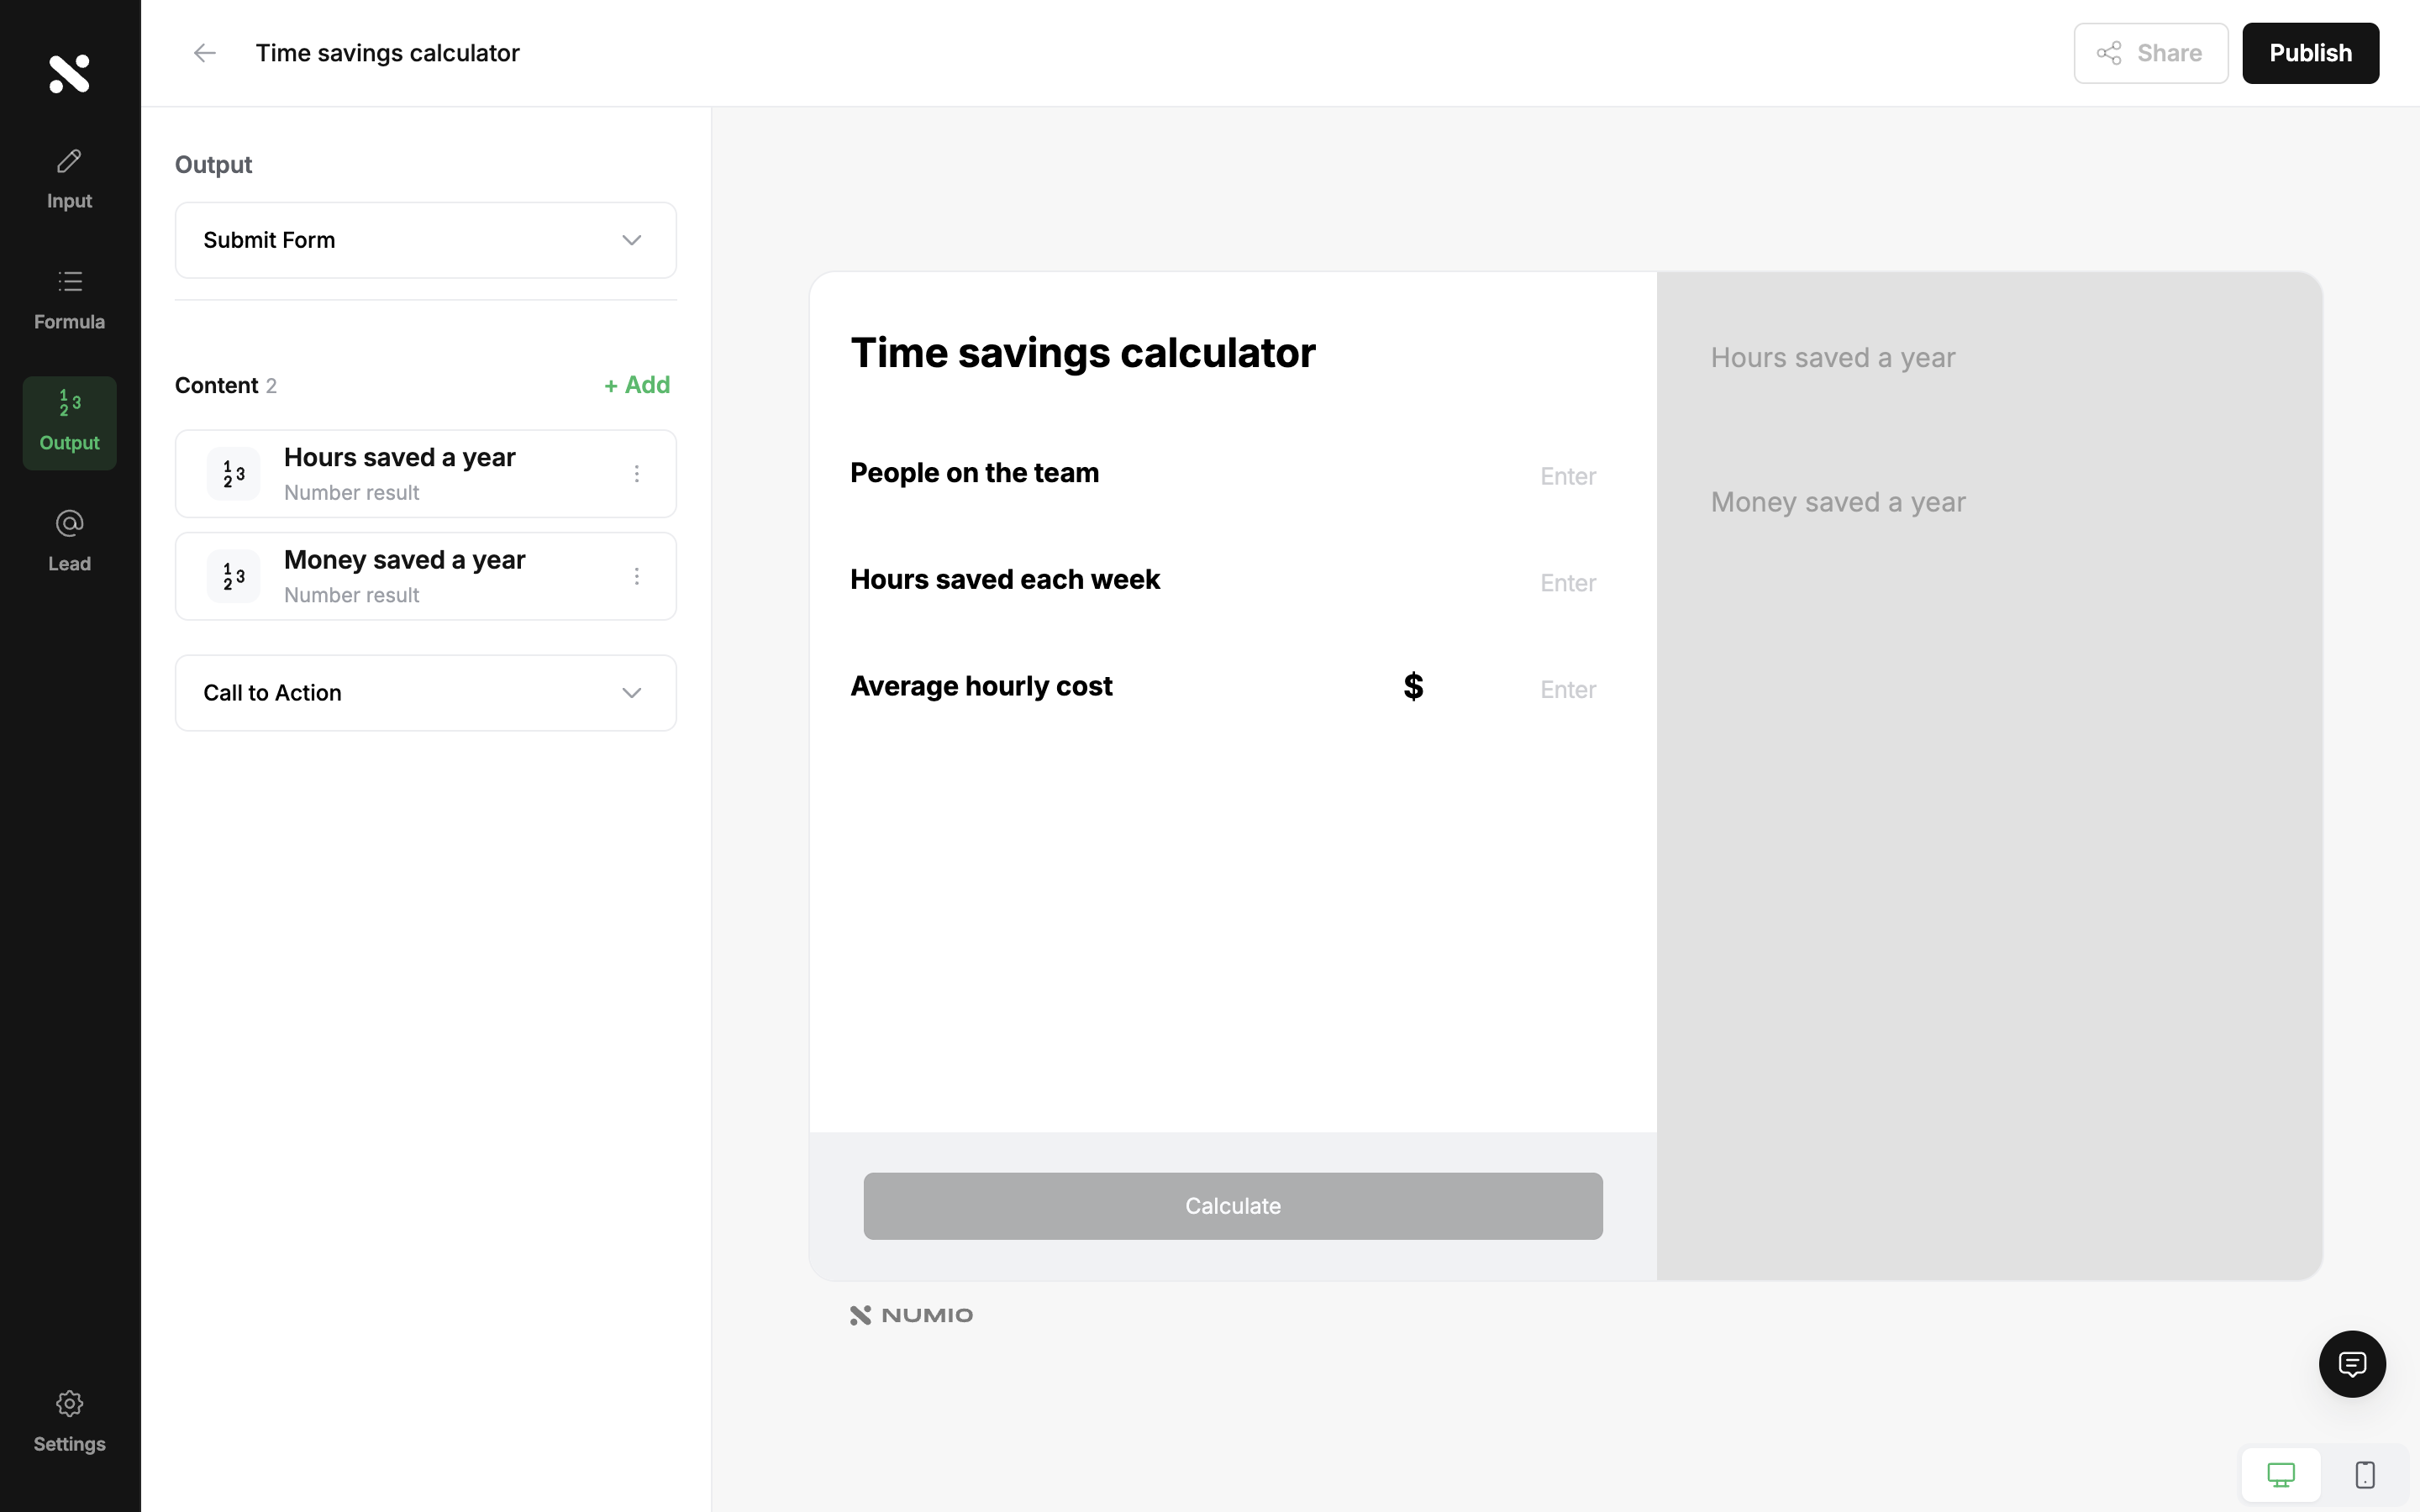
4. Add the two results
Open the Output tab, click + Add, and choose Numeric twice. Assign each one the same way, to the cells holding the two formulas:
- Hours saved a year → the
=B1*B2*48cell → Display as Number - Money saved a year → the
=B5*B3cell → Display as Currency, and mark it the primary result
Currency results carry two decimal places by default. For a yearly figure that is noise — set Decimal places to 0.
5. Check it
The preview is live. Set the inputs to 30 people, 3 hours and $60 and you should see 4,320 hours and $259,200.
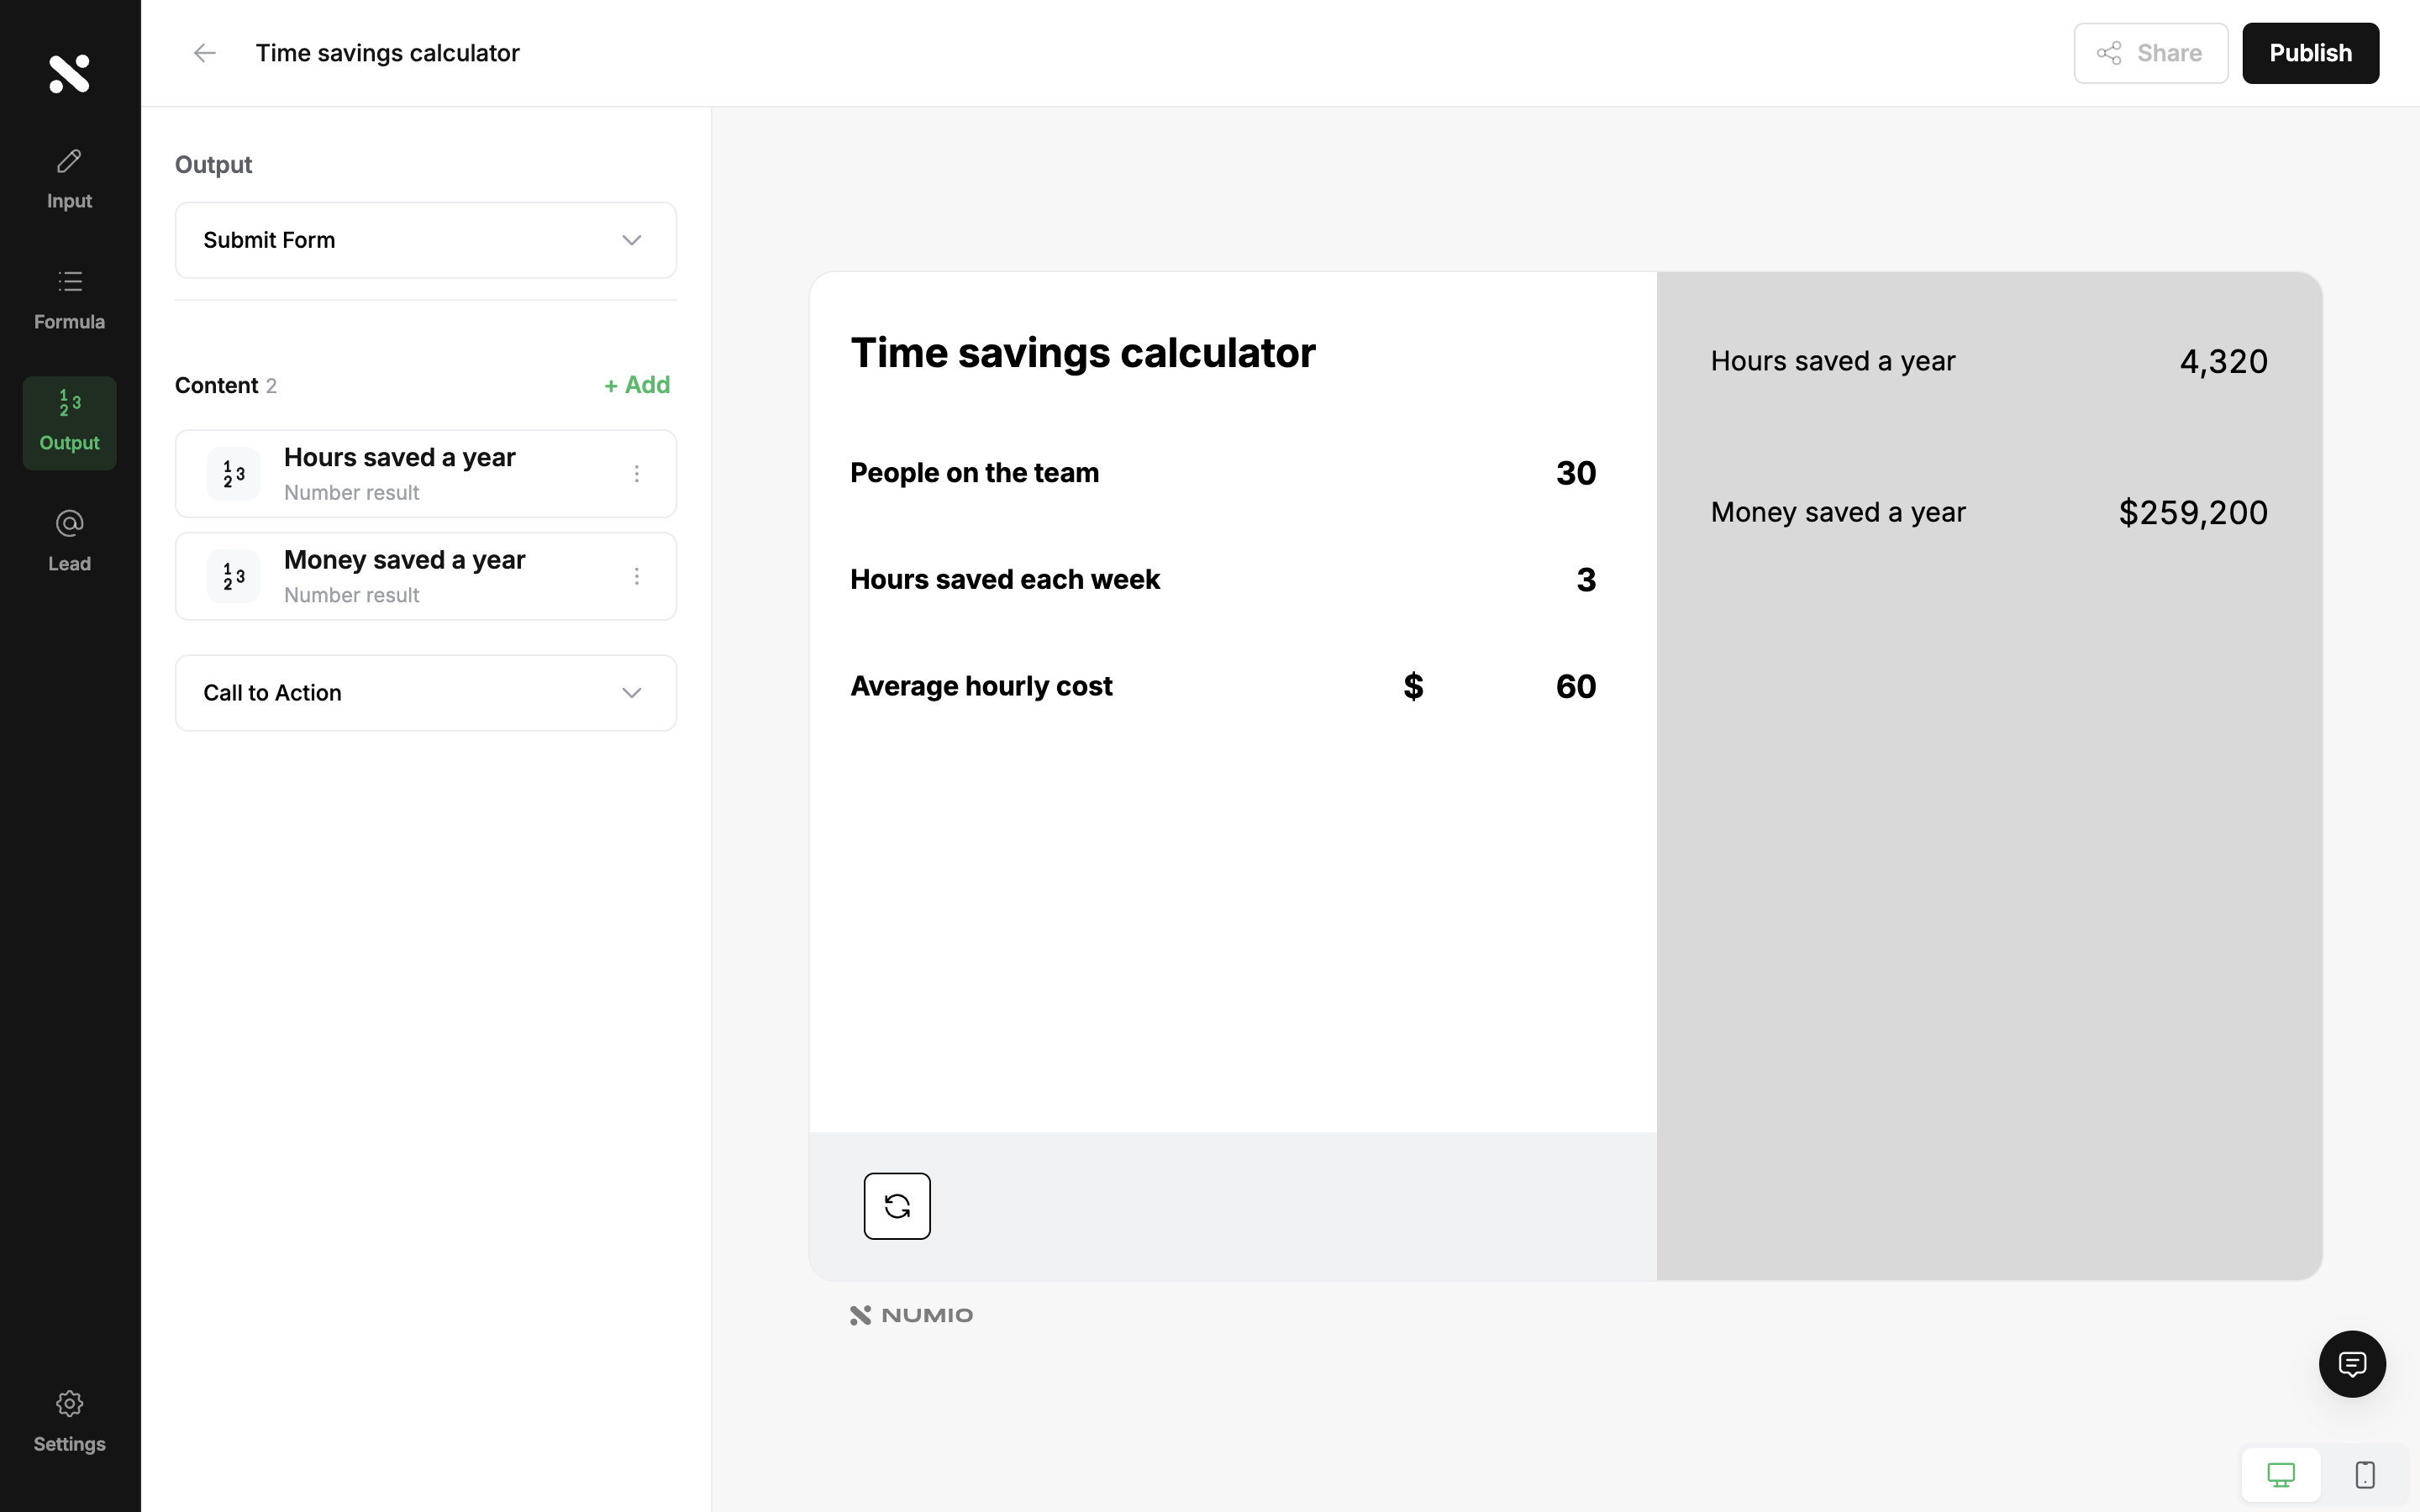
Blank result? Almost always either a result block with no cell assigned, or a formula using a function Numio does not support — see My formula isn't calculating.
Numio supports 22 functions: SUM, AVERAGE (or AVG), MIN, MAX, COUNT, ROUND, ROUNDUP, ROUNDDOWN, ABS, SQRT, POWER, CEILING, FLOOR, IF, AND, OR, NOT, IFERROR, VLOOKUP, HLOOKUP, INDEX, MATCH — plus operators, ranges, and absolute and cross-sheet references. Anything else evaluates to 0, so check before relying on it.
6. Publish and share
Click Publish. Numio lists every result and the cell it reads, so you can check the wiring before it goes out. Then View Sandbox shows exactly what a visitor sees, and Share gives you a public link or an iframe snippet for your own site.
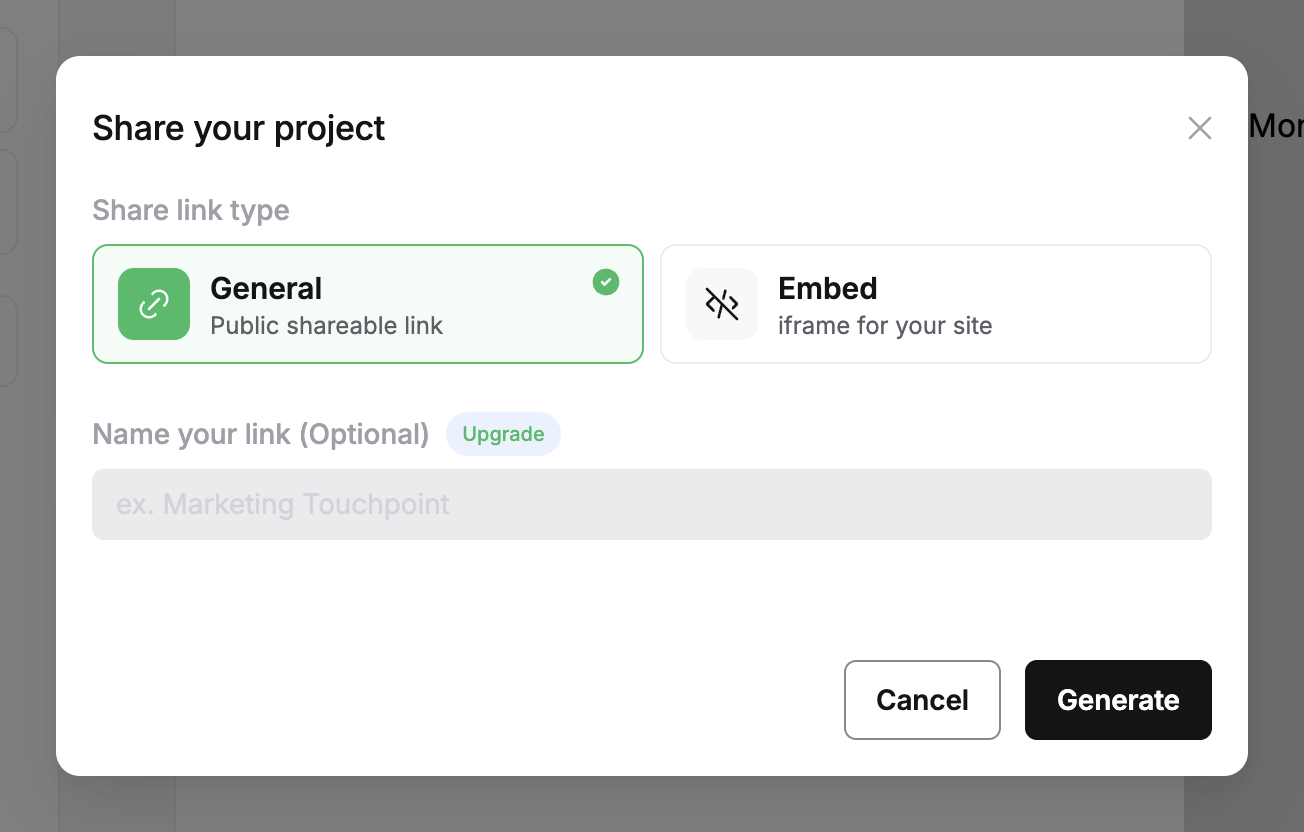
Visitors see only the blocks you exposed — the sheet itself is never displayed.
It is still sent to them. So that the calculator can recompute as a visitor types, the whole workbook — every sheet, value and formula — is included in the published page, where anyone who looks at the page source can read it. Nothing in the workbook is secret. Keep genuinely confidential figures out of it.
No spreadsheet? Start from a blank sheet
If the maths is still in your head, skip the import and type it straight into Numio.
- Create the project without attaching a file.
- Open the Formula tab. It is a working spreadsheet — the same one an import lands in.
- Put your inputs in their own cells and write the formula that depends on them, exactly as you would in Excel.
Then pick up at step 2 above. Because you started from a blank sheet, your cells begin at A1 rather than column D, so the addresses you assign will be B1, B2 and so on.
This route is worth it for a handful of cells. Past that, build it in a spreadsheet and import — it is easier to check your working there.
Then make it yours
Nothing above changes as the model grows:
- Keep a price book or rate table on a second worksheet and pull from it with VLOOKUP — reference tabs are not shown to visitors, though they do travel with the published page, so keep confidential rates out of them.
- Swap an Input Field for a Slider or Dropdown so nobody can enter something implausible.
- Put a lead form on the result and a calculation becomes an enquiry.
Where to go next
- Import a spreadsheet you already have — multi-sheet files, styling, re-importing.
- The Formula tab explained — how the sheet and your blocks relate.
- Embed it on your website — the snippet and how it behaves.
- The editor at a glance — a reference for every tab.